Apache Airflow™ is a widely used platform for organizing data manipulation workflows in directed acyclic graphs (DAGs), which can be used to transform data in Data Warehouses or prepare data for machine learning use.
GitOps is a modern approach to continuous delivery and operational management that leverages Git as the single source of truth for infrastructure and application deployment. By using Git repositories to store declarative descriptions of the desired system state, GitOps ensures that the infrastructure is reproducible, auditable, and easy to manage. In this article, I will show you how to manage ArgoCD with GitOps. We will be using a wide range of tools in our implementation.
Prerequisites
Knowledge requirements
- Basic understanding of Git.
- Basic understanding of Kubernetes and containerization.
- Basic understanding of Infrastructure as Code.
Tools and technologies needed
- Kubernetes v1.29.2 and kubectl v1.30.2 (https://kubernetes.io)
- Terraform v1.9.2 (https://www.terraform.io)
- Helm v3.15.3 (https://helm.sh)
- ArgoCD (https://argoproj.github.io/cd/)
- Arflow v1.14.0 (https://airflow.apache.org/)
Code repository
All related code is stored in my Github repo: airflow-k8s. Please feel free to fork it for your experiments.
Step 1: Provisioning Kubernetes Cluster
Kubernetes, often abbreviated as K8s, is an open-source platform designed for automating the deployment, scaling, and operation of application containers across clusters of hosts. Originally developed by Google, it is now maintained by the Cloud Native Computing Foundation (CNCF).
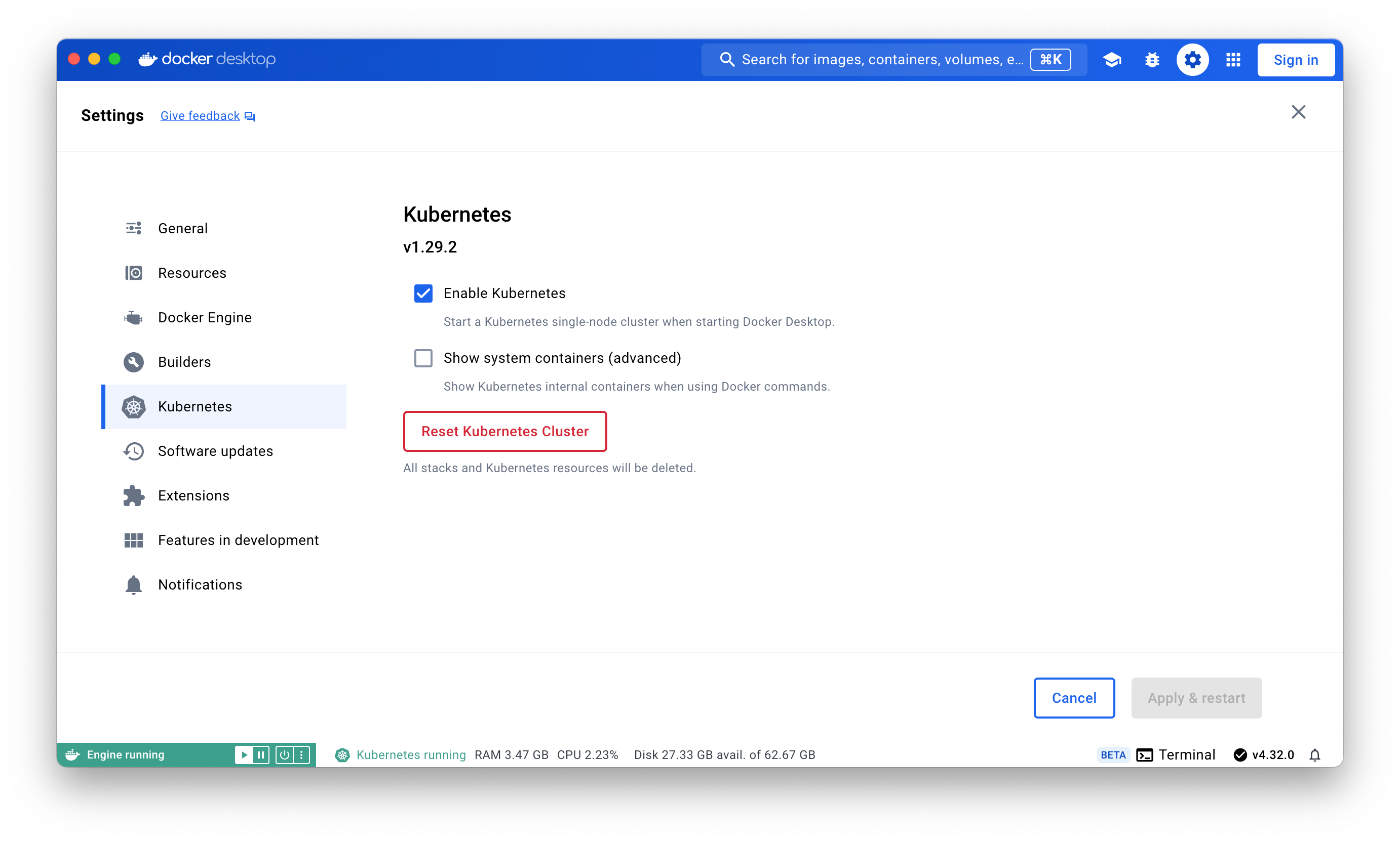
For the purposes of this article, I will be using Docker Desktop with Kubernetes mode enabled. You can easily set it up locally following the official guide Deploy on Kubernetes with Docker Desktop. You can also use a local Kubernetes cluster like MicroK8s, Minikube, Kind, etc., or even use Managed Kubernetes services offered by famous cloud providers like EKS, GKE, AKS, etc.
~ kubectl version
Client Version: v1.30.2
Kustomize Version: v5.0.4-0.20230601165947-6ce0bf390ce3
Server Version: v1.29.2
Step 2: Installing and Configuring ArgoCD
Argo CD is a declarative GitOps continuous delivery tool for Kubernetes. It is part of the Argo project, which includes other tools for continuous integration and delivery (CI/CD) workflows. Argo CD specifically focuses on deploying applications and managing Kubernetes resources in an automated and declarative way, ensuring that the desired state of the application defined in a Git repository matches the actual state in the Kubernetes cluster.
First of all, for deploying ArgoCD with Terraform, you need to clone airflow-k8s repo:
~ git clone https://github.com/xrayid/airflow-k8s
Review the terraform configuration:
terraform {
  required_providers {
    helm = {
      source  = "hashicorp/helm"
      version = "2.14.0"
    }
  }
}

provider "helm" {
  kubernetes {
    config_path = "~/.kube/config"
  }
}

resource "helm_release" "argocd" {
  name             = "argocd"
  repository       = "https://argoproj.github.io/argo-helm"
  chart            = "argo-cd"
  version          = var.argocd_chart_version
  namespace        = "argocd"
  create_namespace = true
}

variable "argocd_chart_version" {
  description = "ArgoCD Helm chart version"
  type        = string
  default     = "7.3.6"
}
Init Terrafrom configuration:
~ terraform init
Initializing the backend...
Initializing provider plugins...
- Reusing previous version of hashicorp/helm from the dependency lock file
- Using previously-installed hashicorp/helm v2.14.0

Terraform has been successfully initialized!

You may now begin working with Terraform. Try running "terraform plan" to see
any changes that are required for your infrastructure. All Terraform commands
should now work.

If you ever set or change modules or backend configuration for Terraform,
rerun this command to reinitialize your working directory. If you forget, other
commands will detect it and remind you to do so if necessary.
Now, you are ready to deploy ArgoCD on Kubernetes. Run the terraform run command, review the plan, and apply changes.
~ terraform apply

Terraform used the selected providers to generate the following execution plan.
Resource actions are indicated with the following symbols:
  + create

Terraform will perform the following actions:

  # helm_release.argocd will be created
  + resource "helm_release" "argocd" {
      + atomic                     = false
      + chart                      = "argo-cd"
      + cleanup_on_fail            = false
      + create_namespace           = true
      + dependency_update          = false
      + disable_crd_hooks          = false
      + disable_openapi_validation = false
      + disable_webhooks           = false
      + force_update               = false
      + id                         = (known after apply)
      + lint                       = false
      + manifest                   = (known after apply)
      + max_history                = 0
      + metadata                   = (known after apply)
      + name                       = "argocd"
      + namespace                  = "argocd"
      + pass_credentials           = false
      + recreate_pods              = false
      + render_subchart_notes      = true
      + replace                    = false
      + repository                 = "https://argoproj.github.io/argo-helm"
      + reset_values               = false
      + reuse_values               = false
      + skip_crds                  = false
      + status                     = "deployed"
      + timeout                    = 300
      + verify                     = false
      + version                    = "7.3.6"
      + wait                       = true
      + wait_for_jobs              = false
    }

Plan: 1 to add, 0 to change, 0 to destroy.

Do you want to perform these actions?
  Terraform will perform the actions described above.
  Only 'yes' will be accepted to approve.

  Enter a value: yes

helm_release.argocd: Creating...
helm_release.argocd: Still creating... [10s elapsed]
helm_release.argocd: Still creating... [20s elapsed]
helm_release.argocd: Still creating... [30s elapsed]
helm_release.argocd: Creation complete after 32s [id=argocd]

Apply complete! Resources: 1 added, 0 changed, 0 destroyed.
After you complete the installation, get the initial admin password using the following command:
~ kubectl -n argocd get secret argocd-initial-admin-secret -o jsonpath="{.data.password}" | base64 -d
Forward port to the internal ArgoCD Kubernetes service:
~ kubectl port-forward svc/argocd-server -n argocd 8080:443
Now you can log in to the ArgoCD UI https://localhost:8080 with admin username and init password.
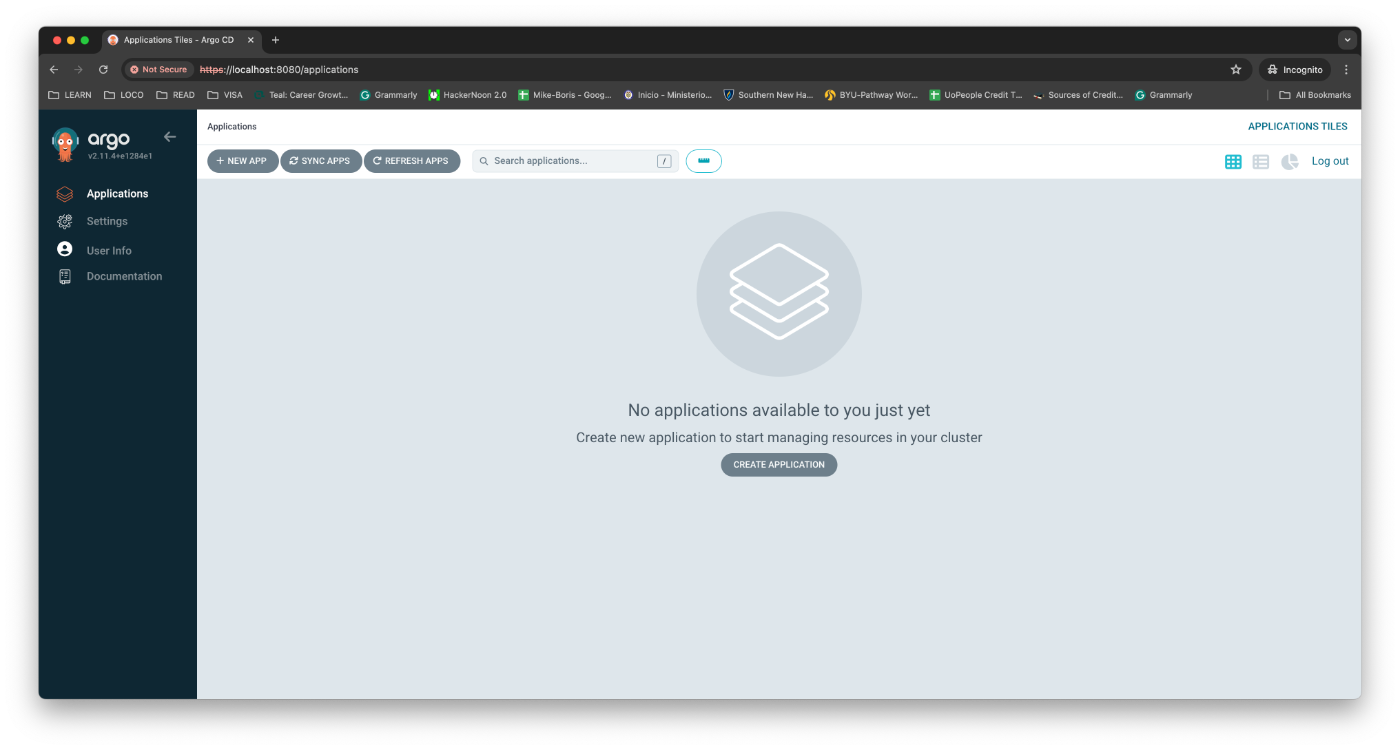
ArgoCD has been installed, and we are ready to deploy Airflow.
Step 3: Installing Airflow as an Argo CD application.
You can use manifests to manage Argo CD applications in an IaC manner.
This is the Argo CD application manifest that I have already prepared. You can find it in the related repo: airflow-root-app.yaml
apiVersion: argoproj.io/v1alpha1
kind: Application
metadata:
  name: airflow-root-app
  namespace: argocd
spec:
  project: default
  source:
    repoURL: https://github.com/xrayid/airflow-k8s.git
    targetRevision: HEAD
    path: airflow-k8s
  destination:
    server: https://kubernetes.default.svc
Using Argo CD UI, create a new application, past the manifest and deploy the Airflow application.
Wait about 5 mins for deployment to be finished. And validate the application status in the UI.
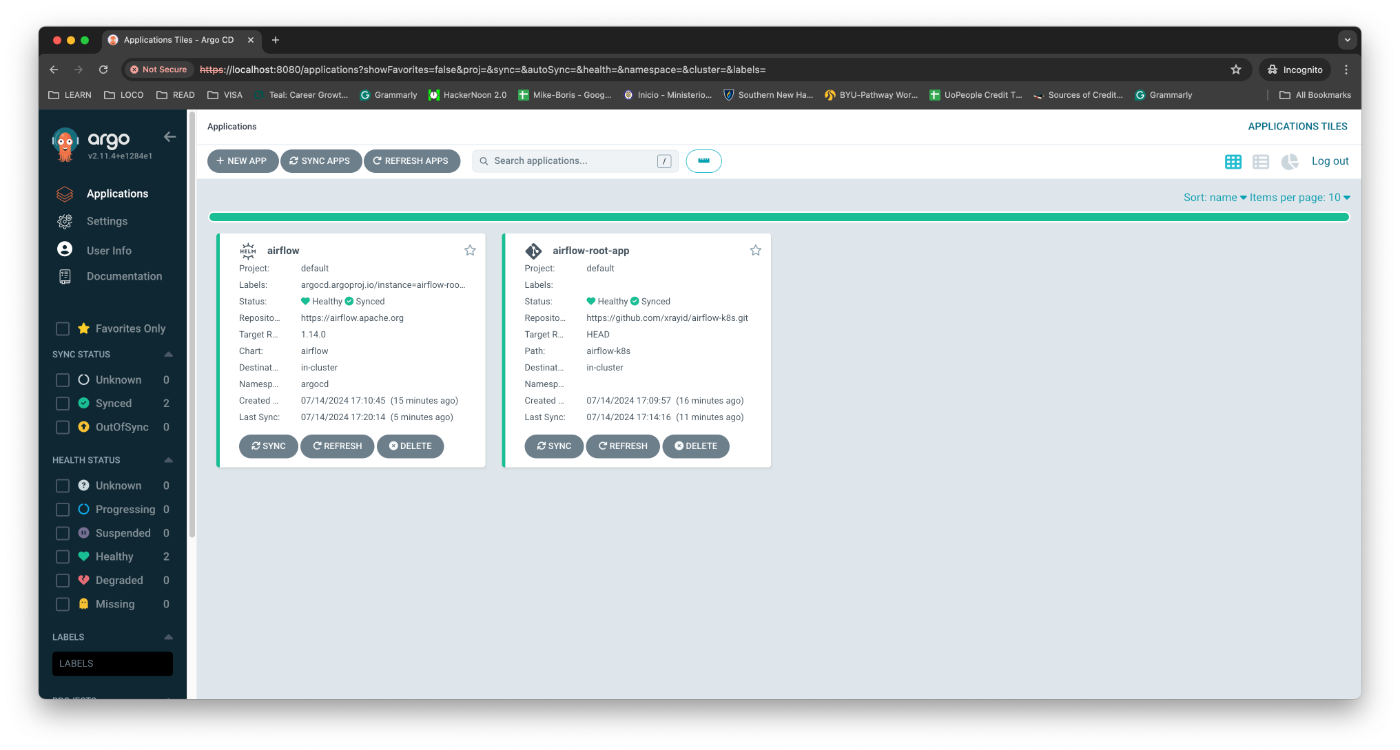
Forward port to the internal ArgoCD Kubernetes service:
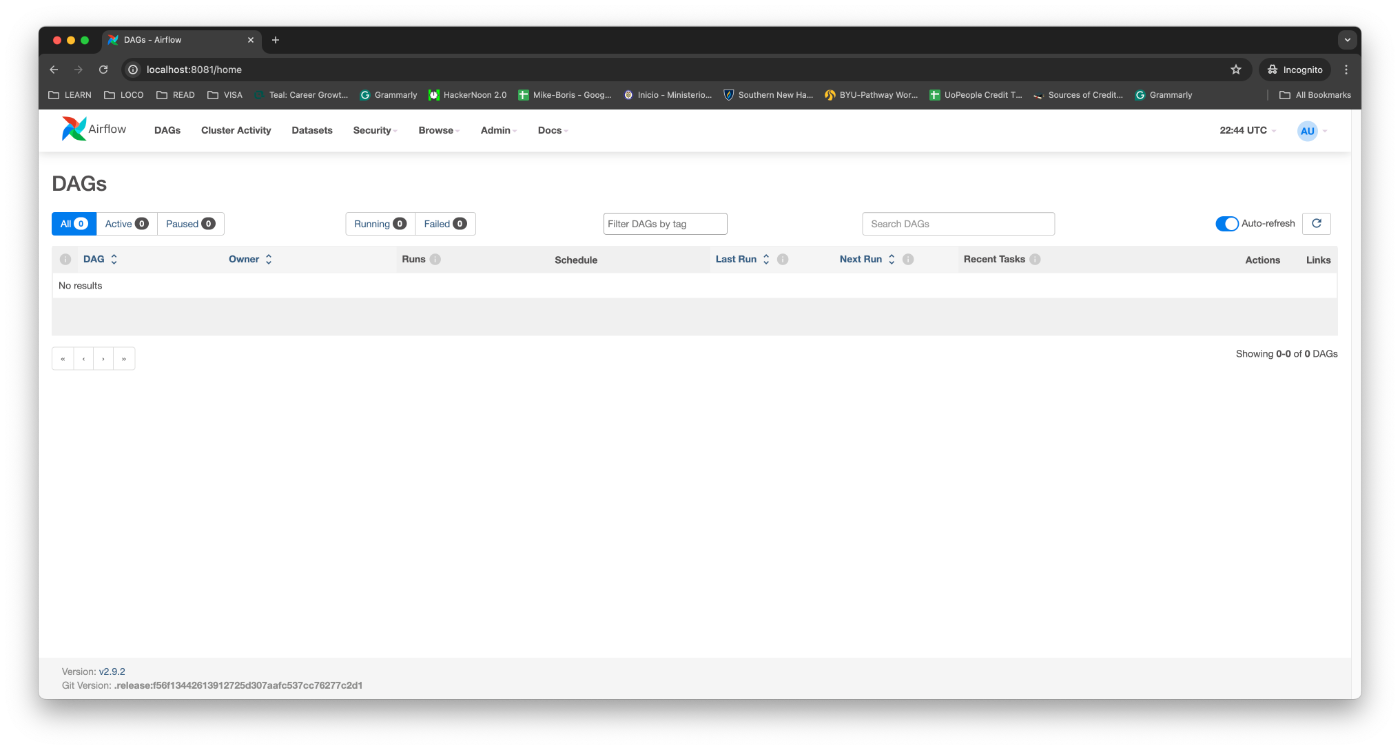
~ kubectl port-forward svc/airflow-webserver 8081:8080 --namespace argocd
Now you can log in to the ArgoCD UI https://localhost:8081 with admin username and admin password.
Conclusion
This article demonstrated IaC and GitOps approaches for deploying and managing Argo CD and Airflow. This is not a production-ready solution, but you can use my code and related documentation as a starting point for improving Apache Airflow management in your environments.
References
- Official Terraform documentation: https://developer.hashicorp.com/terraform
- Official Apache Airflow documentation: https://airflow.apache.org/docs/apache-airflow/stable/index.html
- Official Kubernetes documentation: https://kubernetes.io/docs/home/
- Code repo: https://github.com/xrayid/airflow-k8s
